
Blog
How Can You Tell If a Keyboard Switch Is Broken?
When a key on your keyboard stops working, many people’s first reaction is, “The switch must be broken; time to replace it.” In reality, the path from your finger to the character appearing on the screen involves multiple layers of components: the keycap and the keyboard switch, the hot-swap socket or solder joint, the PCB traces and key matrix, and the firmware and drivers. A failure at any of these stages can manifest as “no response when pressed.” Jumping straight to replacing the switch—or even the entire keyboard—is often an overreaction that misses the root cause.
Some users might not even be able to tell if a keyboard switch is actually faulty, as different types of switches fail in different ways. Mechanical keyboard switches rely on physical metal contacts; when they fail, it’s often audible and can be verified with a multimeter. Magnetic keyboard switches, by contrast, determine key travel based on magnetic field strength—they have no physical contacts, so diagnosis usually requires checking the travel data. Inductive switches, meanwhile, operate on an entirely different sensing principle. This article outlines a diagnostic process—ranging from intuitive checks to using specialized tools—to help you effectively evaluate your keyboard switches.
Step Zero: Is It the Switch, the Socket, or the Firmware?
Before assuming the keyboard switch is at fault, examine the nature of the issue:
- If only a single key is unresponsive, the problem likely lies with the switch itself or the hot-swap socket beneath it.
- If an entire row or column fails, the issue is more likely related to the PCB matrix traces, diodes, or ribbon cables; replacing the switch may not solve the problem.
- If the entire keyboard is unresponsive, you should first check the connection, power supply, and firmware.
These three scenarios require completely different troubleshooting paths; identifying the correct one from the start can save you a great deal of effort.
So, how exactly should you go about it? Here are three methods you can use:
- Remove the keycap and inspect visually: Check for bent pins, cracks in the housing, or any foreign objects or dried liquid residue around the stem.
- Swap-test: If you have a hot-swappable keyboard, remove the suspect switch and install it in a slot known to be working. Observe whether the issue “follows the switch” or “stays in the original position”—if it follows the switch, the switch itself is the problem; otherwise, the issue likely lies with the hot-swap socket or the PCB.
- Software test: Use an online key-testing tool or the manufacturer’s driver software to check if the key is actually sending an electrical signal. This helps rule out “false failures” caused by input method settings, layer mappings, or macro configurations.
Once you have completed these three steps, you will be able to determine whether the problem is indeed with the switch.
How to Tell If a Mechanical Keyboard Switch Is Broken
The failure of a mechanical keyboard switch is both “audible and measurable,” as its core mechanism relies on a pair of metal contacts being pushed together by a spring leaf at the end of the key-press stroke. Wear, oxidation, or “contact bounce” will directly affect the sound, tactile feel, and electrical connectivity of the switch.
Symptoms You Can Feel and Hear
- Complete unresponsiveness: The key registers no input when pressed, and software tests show no activity. Common causes include burnt or severely oxidized contacts, pins broken during installation or removal, or a loose hot-swap socket resulting in poor contact.
- Double-clicking or “chattering”: A single press registers two or more characters. This is caused by the metal spring leaf vibrating (bouncing) the moment the contacts close; aging, wear, or internal debris can exacerbate this issue.
- Sticking or slow rebound: This may be due to debris inside the switch housing, a deformed spring, or an excess of lubricant that has trapped dust and become sticky.
- Loss of tactile feedback (becoming linear): The tactile leaf—the component responsible for the “bump”—may be broken. Such internal structural damage cannot be fixed by cleaning; the switch must be replaced.
- A scratchy, “gritty” sound: Usually a sign of insufficient lubrication or the presence of dust; this is an early indicator of wear.

mechanical keyboard switch
Bench Checks: Continuity, Swap Testing, and Visual Inspection
Beyond visual inspection, a major advantage of mechanical switches is that they can be verified using a multimeter. Set the multimeter to “continuity” mode and place the probes on the two pins of the switch. A functional switch should remain in an “open” state until pressed to the actuation point, at which time it should establish a stable connection; it should then immediately return to an “open” state when released.
If the resistance reading fluctuates significantly while the circuit is closed, or if the key must be pressed unusually deep to register, the contacts are likely worn or oxidized. Performing a “swap test”—moving the switch to a different socket—can help determine whether the issue lies with the switch itself or with a loose hot-swap socket. Someone once replaced three mechanical keyboard switches without fixing the issue, only to discover later that the hot-swap socket had been stretched loose—a process that cost both time and money.
How to Tell If a Magnetic Keyboard Switch Is Broken
The logic for diagnosing magnetic keyboard switches differs significantly from that of traditional mechanical switches—which is precisely why they are so often misdiagnosed. You might find that a key “feels normal” when pressed, yet the keyboard registers no input; conversely, a key might feel “mushy,” when in reality, the sensor readings have simply drifted. To accurately determine whether a switch is faulty, you must first understand how it works.
Why a Magnetic Keyboard Switch Fails Differently
A magnetic keyboard switch contains a small magnet embedded within its stem, positioned directly above a Hall-effect sensor on the PCB. As you press the switch, the magnet moves closer to the sensor, increasing the magnetic field strength. The sensor converts this change in magnetic flux into an electrical signal, which is then processed by the firmware to calculate exactly how many millimeters the key has been depressed.
Because this process involves no physical metal-to-metal contact, issues like contact wear, oxidation, or “chatter” (bouncing) do not occur. However, magnetic switches are susceptible to four failure modes that do not exist in mechanical switches: the magnet shifting or detaching within the stem; failure of the Hall-effect sensor or its solder joints; corruption of the calibration baseline; and interference from external magnetic fields or temperature fluctuations.
This leads to two key characteristics of magnetic keyboard switch failures:
- You may notice that a key requires a deeper press to actuate, or conversely, that it triggers at the slightest touch—eventually leading to a complete failure to register input.
- Determining whether a switch is “broken” requires analyzing data rather than relying on tactile feel. Tactile feedback is determined by the spring and guide rails, whereas the magnetic sensing system operates independently; the two do not interfere with each other.
Five Symptoms Unique to Magnetic Keyboard Switches
- Shifted Actuation Point: You might set the actuation depth to 1.0mm, but find that the key actually requires a 2mm press to register—or, conversely, that it triggers the moment your finger touches it. This is not merely a change in “feel”; it indicates that the magnetic baseline has shifted, causing the firmware to misinterpret the actuation threshold.
- Rapid Trigger Malfunction: The “Rapid Trigger” feature relies on a “reset upon release” mechanism. If the sensor reading fails to return cleanly to the zero point when a key is released, it can lead to issues such as the key failing to reset, missed inputs during rapid typing, or only the first press being registered during quick, repeated taps.
- No Change in Travel Readings: If the value in the analog monitor remains static—stuck at a fixed number even when the keycap is removed and the switch stem is pressed directly—or fails to return to zero after release, it is likely a hardware failure, such as a detached magnet or a faulty Hall-effect sensor. In such cases, the device should be sent for repair.
- Oscillating Readings: If the value in the monitor fluctuates between two distinct, widely separated numbers even when the keyboard is not being touched, this typically indicates an unstable Hall-effect sensor or a loose magnet. This is distinct from “drift” caused by ambient temperature changes; while drift manifests as a slow, minor shift in the decimal places, this issue involves clearly visible, abrupt jumps between values.
- Entire Rows or Columns Failing: This usually points to an issue with the shared power supply, ribbon cable, or scanning circuitry for that specific group of Hall-effect sensors. Replacing individual switches will not resolve this; the PCB and ribbon cables should be inspected instead.
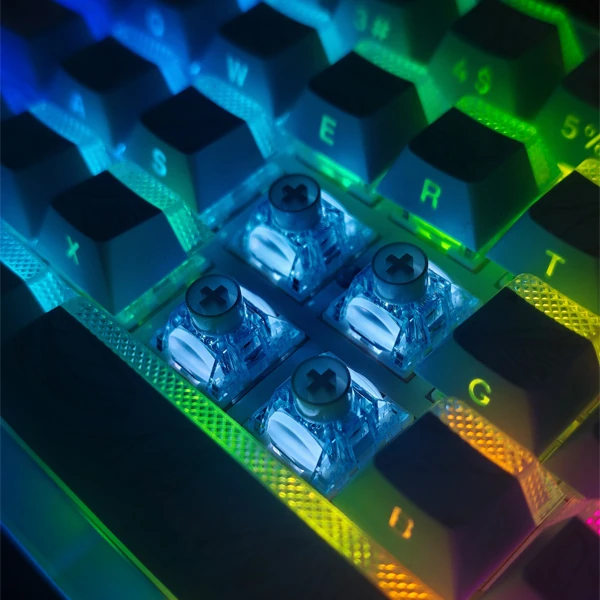
polar magnetic keyboard switch
Additionally, there are two other sources of interference that may make a keyboard appear faulty:
- Temperature: The magnetic flux of the magnets changes with temperature. As the keyboard’s RGB lighting and main controller heat up during use, the readings may gradually drift (by approximately 0.05mm per 10°C). This is why a keyboard that was calibrated immediately upon startup may lose its accuracy after some use.
- External Magnetic Fields: Proximity to items such as magnetic desk mats, mobile phones, wireless chargers, or magnetic cable organizers can cause “phantom” inputs or shifts in the actuation point for certain switches. A telltale sign of this is that the issue disappears when the keyboard is moved to a different location.
These are environmental factors and do not require the replacement of the magnetic switches.
How to Test It: Analog Monitor, Swap Test, and Recalibration
- Open the analog monitor in the driver software or web interface. Press each key slowly all the way down and then release it. For a properly functioning magnetic switch, the output should appear as a smooth curve that rises and falls, changing linearly from 0 to the full travel distance, and returning to 0 upon release. Any plateaus, gaps, sudden jumps, or failure to return cleanly to 0 indicate a malfunction.
- Magnet Inspection: Remove the keycap and bring a paperclip or a small piece of iron close to the top of the switch stem. A functional magnetic switch should exhibit a noticeable magnetic pull. If there is no pull at all, the magnet may have fallen out or been installed backward; in such cases, the switch should be replaced. Also, check for any metallic debris around the stem—magnets can attract tiny metal fragments (such as shavings from the PC case or screws), which can cause sensor drift or even jam the switch stem.
- Swap Test: Move the suspected faulty magnetic switch to a key position known to be working correctly to see if the issue follows the switch. Note: You must recalibrate after swapping; otherwise, the baseline for the new position will remain unchanged, making the readings incomparable. Sometimes, users conclude that a switch is “still broken” after a swap, simply because they failed to recalibrate.
- Proper Recalibration: First, remove any magnetic objects from the vicinity of the keyboard. After powering on, let the keyboard sit idle for at least ten seconds so the firmware can establish a clean zero-point baseline. Allow the keyboard to reach thermal equilibrium during normal operation for 20–30 minutes, then press each key—using the same force you would while typing—all the way down to complete the calibration. Afterward, re-examine the curves in the monitor; if a key still shows a deviation greater than 0.15mm or exhibits erratic “double-peak” jumps, it can be considered a hardware failure.
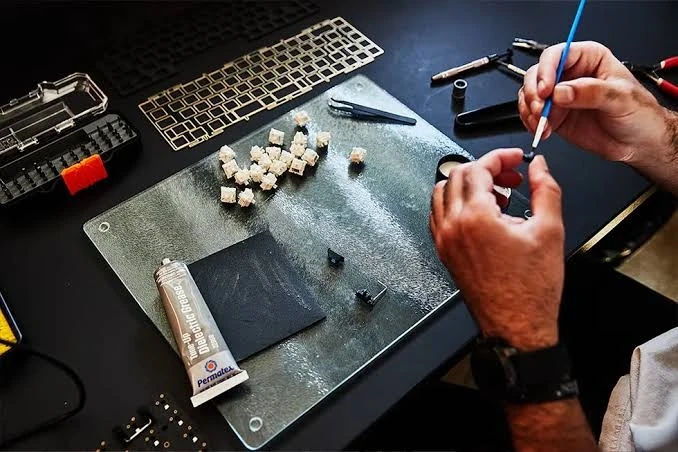
test keyboard switch
Comparing Two Types of Switches
Since failure modes differ significantly between switch types, the following table outlines the key diagnostic criteria—simply refer to the relevant row when troubleshooting:
|
Evaluation Dimension |
Mechanical Keyboard Switch |
Magnetic Keyboard Switch |
|
Signal Source & Failure Point |
Metal contact continuity/break; wear, oxidation, contact bounce, spring leaf fracture |
Hall sensor reads magnetic flux; magnet displacement, Hall element failure, baseline drift |
|
Typical Symptoms |
No response, double-clicking/chattering, loss of tactile bump, sticking/binding |
Actuation point drift, Rapid Trigger failure, frozen readings, or dual-peak jumping |
|
Multimeter Testing Feasibility |
Yes, use continuity mode to directly verify contacts |
Cannot test continuity; can only test power supply and solder joints |
|
Self-Inspection Methods |
Multimeter, switch swapping, listening to sound, checking spring return |
Analog monitor, magnet attraction check, recalibration after swapping |
|
Common Triggers |
High-frequency wear, dust/liquid ingress, excessive lubrication |
Temperature variation, magnetic interference, metal debris ingress, firmware & calibration |
|
Repairability |
Cleaning can salvage some |
Calibration and cleaning can salvage most |
|
Calibration Required After Replacement? |
No, plug and play |
Must be recalibrated, otherwise readings are incomparable |
Fix It or Replace It?
Once a fault is identified, the course of action depends on whether it can be repaired, categorized into four levels:
- Cleaning: If a switch is sticking or experiencing signal drift due to foreign objects, dust, or metal shavings, removing the switch, blowing it clean—or using anhydrous alcohol followed by thorough drying—will often restore functionality.
- Calibration and Firmware: For drift issues in magnetic switches, first remove any nearby magnetic objects and allow the switch to reach thermal equilibrium. Then, recalibrate it and update the firmware; this process can resolve many “suspected” hardware failures.
- Switch Replacement: If a single switch fails on a hot-swappable keyboard, the fastest solution is to replace it. (Remember to recalibrate if it is a magnetic switch.)
- Professional Repair: Issues such as an entire row failing, damage to the Hall-effect sensor or solder joints, or a broken PCB trace are board-level faults. If the device is still under warranty, it is more cost-effective to send it in for professional repair rather than attempting a DIY fix.
Conclusion
To determine whether a keyboard switch is truly broken, follow this sequence: isolate the components, identify the switch type, and verify with data. “Isolating” involves using swap testing and software diagnostics to distinguish between the switch itself, the hot-swap socket, the PCB, and the firmware. “Identifying the type” means understanding that mechanical switch failures typically relate to electrical contacts, whereas magnetic switch failures usually involve magnetic field interference or baseline drift. “Verifying with data” entails checking that a mechanical switch makes or breaks contact cleanly, and ensuring that a magnetic switch exhibits a linear travel curve and returns precisely to its zero position.
Before seeking out a keyboard switch supplier to replace a “broken” switch, follow these three steps to confirm whether it is actually faulty; this can save you from unnecessary expenses. Be particularly mindful of the nuances of magnetic switches: they only truly require replacement due to hardware failure when the readings remain completely static (unresponsive) or when “double-peak” signal fluctuations become a persistent issue.