
Blog
How to Remove Mechanical Keyboard Switches Without Damaging Your Keyboard
As the mechanical keyboard market continues to develop, more and more users are focusing on personalized keyboard experiences. Replacing the mechanical keyboard switch has become an important way to improve the typing experience. However, for beginners, disassembling the mechanical keyboard switch is not simple. Before starting disassembly, understanding the keyboard structure, confirming the switch installation method, and choosing the appropriate tools are crucial.
Different mechanical keyboards may use either a hot-swappable design or a soldered design, each requiring a completely different disassembly process. This article will cover pre-disassembly preparations, the differences between different installation methods, detailed operating steps, and common mistakes, introducing how to safely remove the mechanical keyboard switch without damaging the keyboard, helping users better maintain their keyboards.
Before Removing a Mechanical Keyboard Switch: Know Your Keyboard
Before disassembling the mechanical keyboard switch, you first need to confirm which installation method your keyboard uses. Currently, mechanical keyboards on the market are mainly divided into two types: hot-swappable design and soldered design. The internal structure of these two keyboards directly affects the disassembly method. Starting the operation without confirming the installation method may result in incorrect switch removal or even internal keyboard damage.
Hot-swappable switches offer greater ease of use for users, while soldered switches require more specialized experience. Before disassembling, users can consult the keyboard’s instruction manual or observe the switch installation method by removing a keycap.
Hot-Swappable Mechanical Keyboard Switch
The main feature of the Hot-Swappable Mechanical Keyboard Switch is that it mounts the mechanical keyboard switch in a dedicated hot-swappable socket. This design allows users to directly replace different types of switches without a soldering iron, installing different types of keyboard switches on the same keyboard to quickly experience different input feedback.
For beginners, disassembly is even simpler, requiring only a suitable keycap puller and switch puller. However, even with a hot-swappable structure, incorrect operation angles can still damage the switch housing or subject the hot-swappable socket on the PCB to additional pressure.
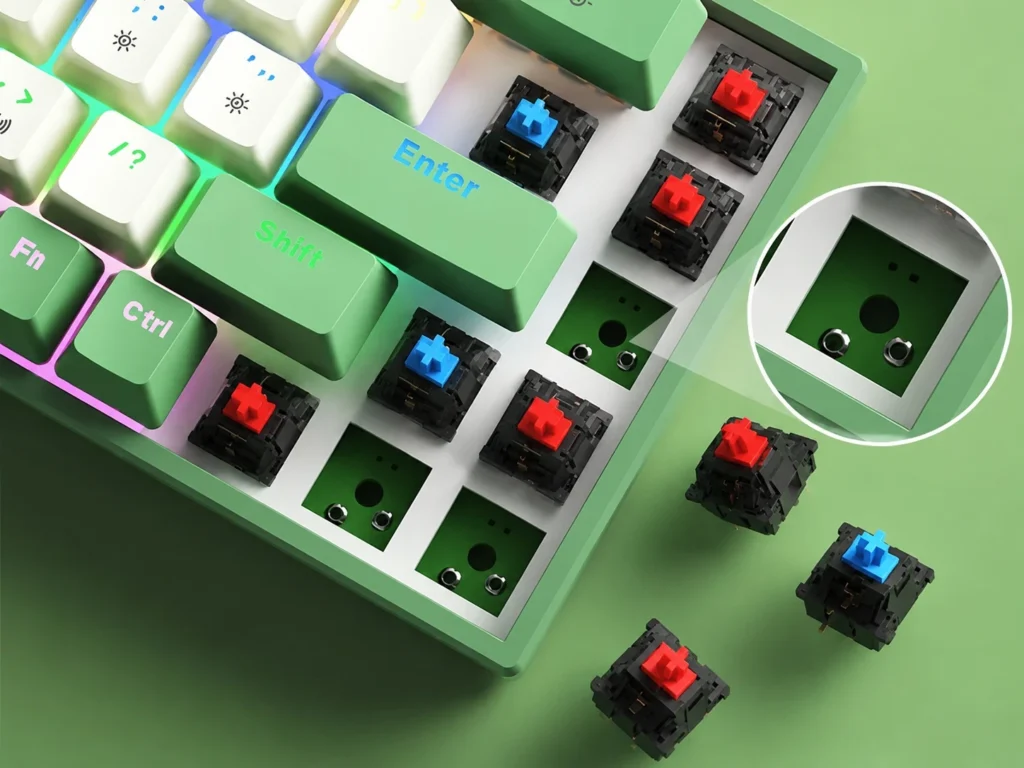
hot-swappable keyboard
Soldered Mechanical Keyboard Switch
The Soldered Mechanical Keyboard Switch is fixed to the PCB with solder, with metal pins passing through the board and soldered together to ensure long-term stable operation of the switches. Because the switches are fixedly connected to the PCB, they cannot be directly removed using a switch puller. Forcibly pulling them out may damage the PCB pads, bend the pins, or even cause the keyboard to malfunction.
For beginners without soldering experience, direct desoldering is not recommended. PCBs are precision components, and improper handling may damage the circuitry. Before attempting disassembly, learn how to use the tools and follow the procedures before deciding whether to attempt it yourself.
Tools You Need to Remove Mechanical Keyboard Switches
Different disassembly needs require different tools. Hot-swappable keyboards usually only require basic disassembly tools; while soldered keyboards require additional soldering equipment.
Keycap Puller
Before disassembling a mechanical keyboard switch, the keycaps must be removed. Using a keycap puller avoids uneven force and damage to the keycaps or switches caused by manual pulling. When using a keycap puller, grip both sides of the keycap and lift it vertically upwards, avoiding lateral movement that could compress the switch. After removing the keycap, the switch structure can be observed.
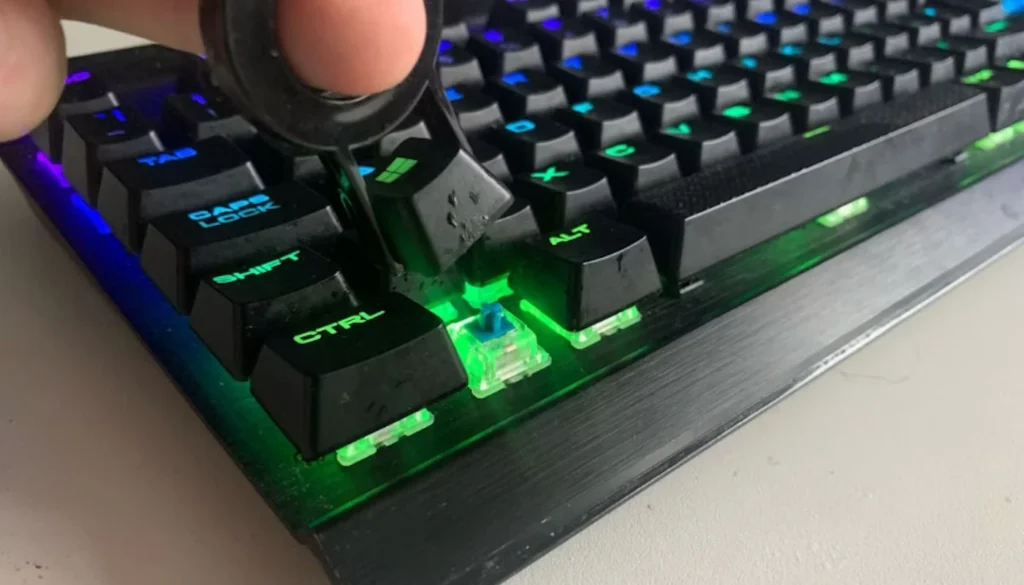
keycaps puller
Mechanical Keyboard Switch Puller
The mechanical keyboard switch puller is one of the most important tools for disassembling hot-swappable keyboard switches. Unlike removing keycaps, switches usually have clips on both sides. Therefore, a suitable switch puller needs to be able to clamp the clips on the top and bottom sides of the switch, rather than pulling directly from the top of the switch.
When using a switch puller, clamp the clips on both sides of the switch and pull it out vertically. If the switch cannot be moved, do not force it. Readjust the tool’s position to ensure the clips are engaged.
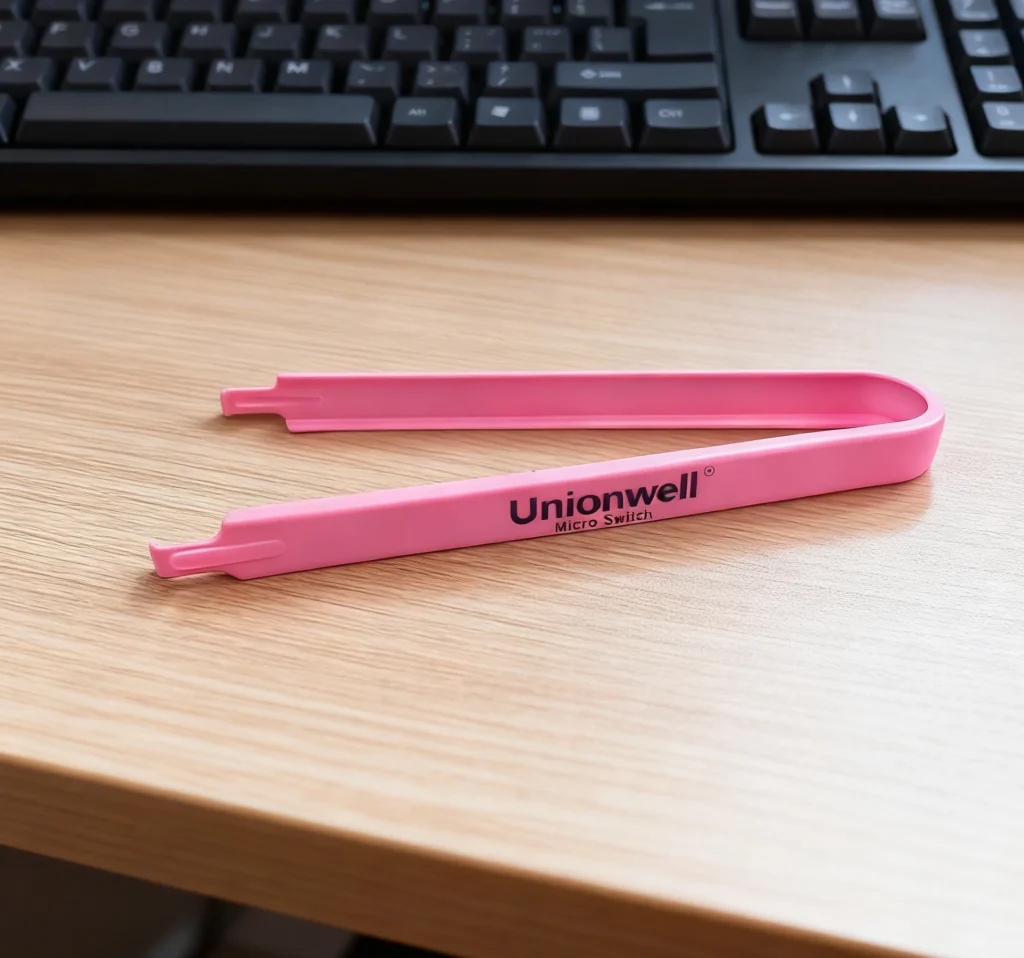
keyboard switch puller
Other Helpful Tools
In addition to the keycap puller and switch puller, users can prepare auxiliary tools, including lighting tools, small screwdrivers, etc. For soldered mechanical keyboards, additional tools such as soldering irons, desoldering pumps, or desoldering wire are needed. These tools can help handle the switch solder joints, allowing the mechanical keyboard switch to safely detach from the PCB. Beginners should choose appropriate equipment based on the keyboard’s structure to avoid damage caused by using non-professional tools.
How to Remove a Hot-Swappable Mechanical Keyboard Switch
For mechanical keyboards with a hot-swappable design, removing the mechanical keyboard switch is relatively simple. However, the hot-swappable sockets on the PCB are precision components, and improper handling can still lead to loose sockets or damaged switch pins.
Before starting disassembly, it is recommended to confirm the specific key location that needs to be replaced and prepare a keycap puller and switch puller. The core principle throughout the process is to maintain stability and operate vertically to avoid putting additional pressure on the internal structure of the keyboard.
Step 1: Disconnect the Keyboard
Before disassembling the mechanical keyboard switch, the first step is to disconnect the keyboard by unplugging the USB cable or turning off the power switch to prevent the keyboard from remaining operational during disassembly. This reduces the risk of abnormal damage to electronic components and allows the user to focus more on the mechanical disassembly process.
Additionally, before starting, place the keyboard on a flat and stable surface to prevent the tools from shifting due to keyboard movement. If multiple switches need to be removed, note the type of mechanical keyboard switch originally used for each location for later reinstallation.
Step 2: Remove the Keycap
First, align the keycap puller with both sides of the target keycap, then pull the keycap upwards evenly. Maintain a vertical movement, not a side-to-side wiggle. If the keycap is tight, do not suddenly increase the pulling force to avoid damaging the keycap’s edge structure. After removing the keycap, you can further observe the structure around the switch to confirm the position of the retaining clips on both sides of the switch, preparing for the next disassembly step.
Step 3: Locate the Switch Clips
The mechanical keyboard switch is secured in the mounting plate by upper and lower clips to ensure stability during use. When disassembling, locate the clip positions first to avoid directly pulling and damaging the switch housing or internal structure.
When using the switch puller, clamp the clip areas on the upper and lower sides of the switch and pull it out vertically. If it is not properly secured, do not force it; adjust the tool position to avoid damaging the mounting plate or hot-swappable socket.
Step 4: Pull the Mechanical Keyboard Switch Straight Up
After the switch puller correctly clamps the mechanical keyboard switch, gently tighten the clips on both sides of the switch, then pull it upwards while maintaining a vertical direction. The entire action should be performed smoothly, not quickly.
After the switch is released, it will feel loose. At this point, continue pulling vertically. If it cannot be removed, avoid using brute force. Check the following key areas:
- Confirm that the switch puller is truly clamping the switch clips;
- Confirm that the keyboard does indeed use a hot-swap design;
- Check for any issues such as switches being installed too tightly or structural abnormalities.
The PCB and hot-swap socket of a mechanical keyboard are not suitable for withstanding excessive mechanical shock. Therefore, patient adjustment is more important than forced operation.
Step 5: Inspect the Switch and Hot-Swap Socket
After successfully removing the mechanical keyboard switch, do not immediately install a new switch. Instead, check its condition after disassembly:
- Check if the two metal pins of the old switch are bent. 1. If the pins are noticeably deformed, it may affect subsequent installation and signal connection.
- Observe whether the hot-swap socket on the PCB remains intact. If the hot-swap socket is loose, detached, or abnormally positioned, it may cause the new switch to fail to trigger properly after installation.
By checking, users can identify potential problems in time and avoid subsequent special situations.
How to Remove a Soldered Mechanical Keyboard Switch
Compared to hot-swappable keyboards, disassembling a soldered mechanical keyboard switch requires first disconnecting the solder joints and then releasing the mechanical fixing structure. It cannot be directly removed using a switch puller.
For beginners, disassembling soldered switches is more difficult. Understanding the PCB structure and how to use soldering tools is necessary, or watching instructional videos is recommended. Before disassembling, the keyboard should be disassembled, and the corresponding solder points located.
Remove the Solder from the Switch Pins
When disassembling a soldered mechanical keyboard switch, the first step is to melt the solder on the pins with a soldering iron and then remove the solder using a desoldering pump or desoldering tape. The operation must be timed carefully; excessive time or force may damage the PCB pads, resulting in keyboard damage.
Release the Mechanical Keyboard Switch from the Plate
After completely removing the solder, ensure the mechanical keyboard switch can move freely before using a switch puller to remove it from the front. When pulling out a mechanical keyboard switch, do so slowly and steadily. If there is resistance, check for residual solder to avoid damaging the PCB and mounting plate.
Common Mistakes When Removing Mechanical Keyboard Switches
Using Excessive Force
If a mechanical keyboard switch cannot be removed, do not force it. Stop the operation and check the securing position to prevent the switch clips from breaking, the PCB socket from becoming loose, or even causing the entire keyboard to malfunction.
Using the Wrong Tool
Choosing the wrong tool is also a possible cause of keyboard damage. Tweezers, screwdrivers, etc., cannot apply even force and may damage the PCB, switches, or mounting structure. Using a switch puller can stably hold the mechanical keyboard switch and is more suitable for switch removal.
Ignoring the Keyboard Structure
Different mechanical keyboards use different installation methods. If the user does not understand the keyboard structure and directly uses a switch puller, it may lead to incorrect disassembly. Forcing the switch may even damage the PCB of a soldered keyboard. Therefore, understanding the keyboard structure before disassembly is an important step in protecting the device. H3: Pulling at an Angle. When disassembling the mechanical keyboard switch, maintain a vertical orientation and operate smoothly. Pulling at an angle will increase the pressure on the switch pins, sockets, and mounting plate, potentially affecting connection stability.
How to Avoid Damaging Your Mechanical Keyboard
Safe disassembly of a mechanical keyboard switch not only depends on tool selection, but also on user operating habits:
- A working environment with sufficient lighting should be selected to help users clearly observe the shaft buckle, pins and PCB structure to reduce misoperation.
- Keep the desktop tidy to avoid losing small parts. For novices who are performing keyboard maintenance for the first time, it is recommended to only disassemble one mechanical keyboard switch at a time. This will make it easier to master the steps and make it easier to confirm whether each step is performed correctly.
- After disassembly, check the shaft pins, PCB socket and positioning plate structure. If you find that the pins are bent, the socket is abnormal, or the shaft cannot be installed normally, you should solve the problem first instead of continuing to force the installation.
If the mechanical keyboard switch cannot be pulled out smoothly, stop the operation immediately and reconfirm the keyboard structure and disassembly method.
Conclusion
Disassembling a mechanical keyboard switch is not complicated, but it is based on correctly judging the keyboard structure, choosing appropriate tools, and mastering the correct method. During the entire disassembly process, avoid using excessive force and do not force operations without understanding the keyboard structure. These are important principles for protecting the keyboard.
As the customized mechanical keyboard market continues to develop, users have put forward more demands for the feel, lifespan and functionality of mechanical keyboard switches produced by different keyboard switch manufacturers. Mastering the correct disassembly and replacement methods can not only help users maintain the keyboard, but also allow users to experience different types of keyboard switches more freely, further improving their personal experience.