
Blog
Mechanical Keyboard Switch Cleaning Guide for Beginners
Mechanical keyboards are widely used in gaming, office work, and content creation due to their excellent feel, wide selection of switch types, and durability. The core component that determines the typing experience is the mechanical keyboard switch. With prolonged use, dust, grease, hair, and food debris gradually accumulate around the switches, potentially leading to increased pressure resistance, increased noise, decreased feel, and even affecting key actuation stability.
For beginners, whether the switches need to be disassembled, the differences in cleaning methods, and how to avoid incorrect operation are all issues that need to be addressed. This article will introduce the cleaning methods, operating steps, precautions, and daily maintenance suggestions for mechanical keyboard switches to help you clean them safely and efficiently and keep your keyboard in good condition.
Why Mechanical Keyboard Switch Cleaning Is Important
Although mechanical keyboard switches have a long mechanical lifespan, long-term stable operation still requires regular cleaning. Dust, hair, and debris in office, home, or gaming environments will gradually enter the keyboard, increasing switch friction, causing less smooth keystrokes, abnormal noise, and potentially affecting switch rebound and key actuation stability, especially in high-frequency areas.
Therefore, regular cleaning can effectively reduce the accumulation of contaminants, maintain consistent key feel, improve the typing experience, reduce the probability of malfunctions and breakdowns, and improve the overall reliability of the keyboard. At the same time, good maintenance habits can also keep the keyboard clean, extend the stable lifespan of the mechanical keyboard switch, and reduce later maintenance costs.
However, it should be noted that cleaning is only routine maintenance. If the switches have mechanical damage or contact failure, cleaning alone cannot restore performance; it is recommended to replace the switches or have them professionally repaired.
Before Cleaning a Mechanical Keyboard Switch
Before starting the cleaning process, beginners need to understand their keyboard’s structure. Different mechanical keyboards use different switch mounting methods, which determines the differences in the subsequent cleaning procedures. Currently, mechanical keyboards on the market can be mainly divided into two types: Hot-Swappable and Soldered. Before preparing for any cleaning work, confirming your keyboard type is more important than immediately starting disassembly.
Identify a Hot-Swappable Mechanical Keyboard
Hot-Swappable mechanical keyboards use a hot-swappable design. The keyboard switch is installed in a hot-swap socket and can be directly removed and installed using a keyboard switch puller without soldering. This design facilitates cleaning of keycaps, the mounting plate, the area around the switches, and the hot-swap socket, and also facilitates daily maintenance and custom upgrades. When disassembling, a dedicated switch puller should be used, and the switch should be pulled out vertically to avoid bending the pins or damaging the socket.
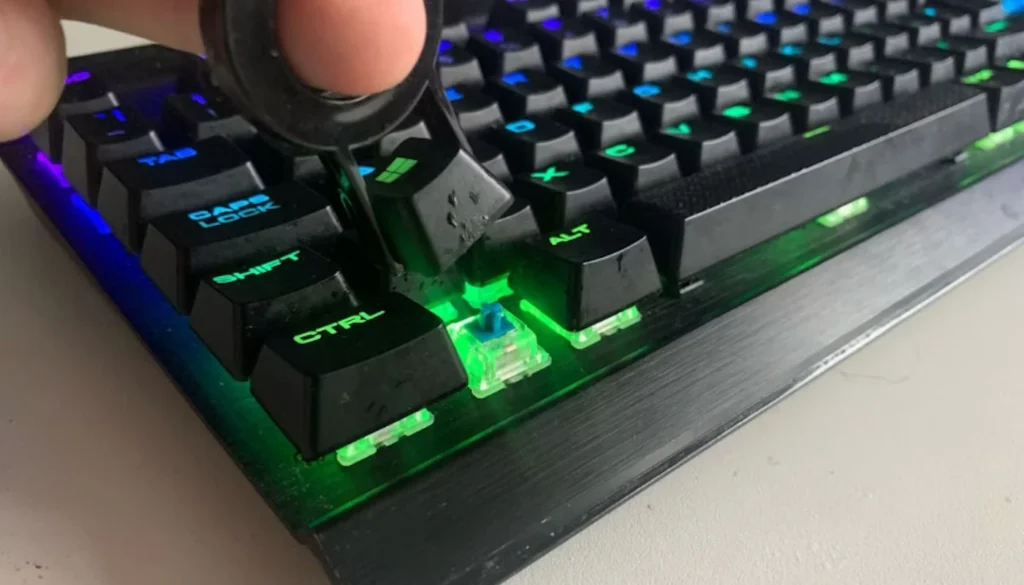
hot-swappable mechanical keyboard
Identify a Soldered Mechanical Keyboard
Soldered mechanical keyboards use soldering to fix the keyboard switch to the PCB and cannot be directly disassembled. Routine maintenance mainly involves cleaning the keycaps, mounting plate, top of the switches, and keyboard crevices. For deeper maintenance requiring switch removal, professional tools such as a soldering iron are needed to remove the solder joints. Users without soldering experience are advised against attempting disassembly to avoid damaging the PCB or affecting the keyboard’s normal operation.
In case of emergencies such as spilled drinks requiring immediate cleanup, it is recommended to refer to the article “How to Remove a Mechanical Keyboard Switch Without Damaging Your Keyboard” for proper keyboard switch disassembly instructions.
Tools for Cleaning a Mechanical Keyboard Switch
Choosing the right tools is crucial for effective cleaning of a mechanical keyboard switch. Professional tools not only improve cleaning efficiency but also reduce the risk of accidental operation.
Keycap Puller
The keycap puller is one of the most common maintenance tools for mechanical keyboards. Before cleaning, you first need to remove the keycaps in the target area. Compared to pulling the keycaps by hand, the keycap puller applies force more evenly, reducing the risk of keycap damage and avoiding unnecessary lateral pressure on the mechanical keyboard switch. After removing the keycaps, users can more easily observe the dust accumulation on the top of the switches, the mounting plate, and the gaps in the keyboard, providing ample space for subsequent cleaning.
Compressed Air
Compressed air is one of the most effective tools for daily maintenance of a mechanical keyboard switch. It can quickly blow away dust, hair, food crumbs, and other small particles. Compared to direct contact with the switches, compressed air does not create mechanical friction, making it ideal for daily dust removal.
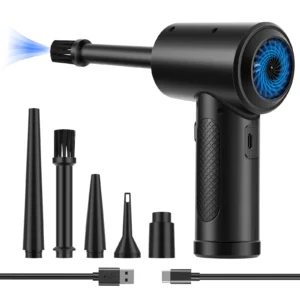
compressed air
However, it is recommended to maintain an appropriate blowing distance and use short, multi-angle blowing techniques to ensure dust is effectively expelled and prevents it from being blown deeper.
Soft Brush
For dirt that compressed air cannot completely remove, a soft-bristled brush can be used for further cleaning, such as the top of the switches, the mounting plate, and some keyboard crevices. However, choose a soft-bristled brush; avoid using hard-bristled brushes or metal brushes to prevent scratching the keyboard surface or switch housings. Clean gently, brushing slowly in the direction of dust accumulation.
Cleaning Swabs and Isopropyl
Alcohol For some difficult-to-reach areas, cotton swabs with a small amount of isopropyl alcohol can be used for spot cleaning. Isopropyl alcohol evaporates quickly and leaves little residue, making it suitable for removing grease or stubborn stains.
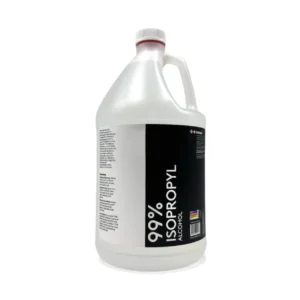
Isopropyl alcohol
Note that the cotton swabs should be kept slightly damp during cleaning; do not drip liquid, and never pour large amounts of alcohol directly into the mechanical keyboard to prevent short circuits. After cleaning, wait for the isopropyl alcohol to completely evaporate and ensure the keyboard is completely dry before reconnecting the power and continuing to use it.
How to Clean a Hot-Swappable Mechanical Keyboard Switch
Compared to a soldered keyboard, a hot-swappable keyboard makes it easier to disassemble the mechanical keyboard switch, allowing for a more thorough cleaning of the switches and mounting plate. However, patience and gentle handling are still necessary to avoid damaging the pins or hot-swap socket.
Step 1: Disconnect the Keyboard
Before starting the cleaning, turn off the keyboard power and disconnect the USB or wireless connection to prevent accidental key presses or potential hazards from liquids or static electricity. Ensure the keyboard is completely powered off before beginning the cleaning process.
Step 2: Remove the Keycaps
After powering off, use a keycap puller to remove the keycaps vertically. Avoid wiggling or pulling forcefully to prevent damage to the keycaps or lateral pressure on the mechanical keyboard switch. Be especially gentle when removing larger keys with stabilizer bars, such as the spacebar, Enter, and Shift keys. After removing the keycaps, check and clean any dust, grease, and debris from the bottom of the keycaps.
Step 3: Clean Around the Mechanical Keyboard Switch
After removing the keycaps, first use compressed air to remove dust and debris from around the mechanical keyboard switch, the mounting plate, and crevices. Then, use a soft-bristled brush or cotton swabs to clean the details. Avoid using needles, tweezers, screwdrivers, or other sharp tools to penetrate the switches, as this may damage the switches, mounting plate, or hot-swap socket.
Step 4: Remove and Clean the Mechanical Keyboard Switch
After cleaning the surface, you can use a switch puller to vertically pull out the mechanical keyboard switch. After removal, focus on cleaning the switch housing, the area around the switch stem, and the bottom to remove dust. Usually, a soft-bristled brush or compressed air is sufficient. If there is a small amount of oil, you can gently wipe the exterior with a cotton swab dipped in a small amount of isopropyl alcohol.
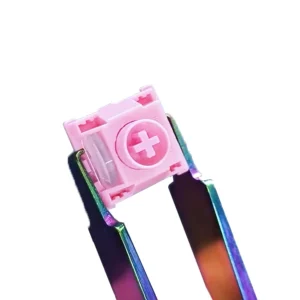
remove the mechanical keyboard switch
However, beginners are not advised to use a switch opener to disassemble the internal switches for cleaning purposes, as this may result in lost parts or incorrect assembly. Regular maintenance by keeping the exterior clean is usually sufficient.
Step 5: Inspect Before Reinstalling
Before reinstalling, check the mechanical keyboard switch pins for bent wires, the hot-swap socket for damage, and for any remaining dust. Once everything is confirmed to be normal, vertically reinstall the switch into the socket and install the keycaps. Finally, test the key actuation and rebound to ensure cleaning is complete.
How to Keep a Mechanical Keyboard Switch Clean Longer
Rather than a one-time deep cleaning, establishing good daily maintenance habits is more important. Regular maintenance not only reduces dust accumulation but also helps the mechanical keyboard switch maintain a stable typing experience over a long period.
Develop Good Daily Habits
Many keyboard contaminations stem from daily usage habits. Keeping your desktop and hands clean, avoiding eating while using the keyboard, and covering it with a dust cover when not in use can reduce the entry of dust and oil. This reduces the frequency of cleaning and extends the lifespan of the mechanical keyboard switch.
Create a Regular Mechanical Keyboard Switch Cleaning Schedule
Establishing a fixed maintenance cycle is more scientific than waiting until the keyboard is heavily dusty before cleaning. It is recommended to blow off dust every 2-4 weeks, perform a regular cleaning every 2-3 months, and a deep cleaning every 6-12 months; in dusty environments or environments with pets, the interval can be shortened appropriately. Regular maintenance helps reduce dirt buildup and maintains the smooth feel and stable performance of the mechanical keyboard switch.
FAQ
Q1: Can I repeatedly wipe the mechanical keyboard switch directly with alcohol wipes?
A1: You can use a small amount of isopropyl alcohol with cotton swabs to clean it, but do not allow large amounts of liquid to seep into the switches to avoid damage.
Q2: Can I clean the Mechanical Keyboard Switch directly while the keyboard is powered on?
A2: Not recommended. Disconnect the power or turn off the keyboard before cleaning to reduce the risk of accidental operation and short circuits.
Q3: Can I use household glass cleaner to clean the Mechanical Keyboard Switch?
A3: Not recommended. These types of household cleaners may corrode the plastic casing or leave chemical residues, affecting switch performance.
Q4: The Mechanical Keyboard Switch is difficult to remove; can I force it out?
A4: No. First, confirm that the keyboard supports hot-swapping and use a dedicated switch puller. Forcing it out may damage the switches or the keyboard.
Q5: Will it save time to remove and clean all the Mechanical Keyboard Switches at once?
A5: Not recommended for beginners. It’s best to clean them by area or individually to avoid confusion or missing parts during reassembly.
Conclusion
Keeping your mechanical keyboard switch clean is crucial for stable keyboard operation. Regularly removing dust, grease, and debris improves feel, sound, and typing experience. Hot-swappable keyboards are suitable for deep cleaning, while soldered keyboards require external maintenance. Use appropriate tools to avoid damaging the switches, PCB, or hot-swappable sockets.
For keyboard switch manufacturers, continuously improving product consistency, durability, and maintainability provides users with a more stable and comfortable typing experience; while consistent, proper maintenance by users ensures optimal long-term switch performance.