
Blog
How to Remove a Mechanical Keyboard Switch Without a Tool?
Under normal circumstances, using a dedicated switch puller is recommended when removing mechanical keyboard switches. A puller grips the locking tabs on both sides of the switch housing simultaneously, ensuring even upward force and minimizing the risk of housing tilt, bent pins, or excessive stress on the PCB socket—making it particularly ideal for hot-swappable keyboards. However, in special situations—such as a beverage spill—where the proper tool is unavailable, improvised removal methods may be used.
That said, improvised tools cannot control the locking tabs as stably as a dedicated puller; improper force application can damage the housing, bend the pins, or even harm the hot-swap socket. Therefore, tool-free removal should be reserved for emergencies and is not recommended as a routine method. This article aims to help users safely remove switches using a controlled, improvised approach when a proper switch puller is unavailable.
Can You Remove a Mechanical Keyboard Switch Without a Tool?
You can attempt this in special situations, but first, you must confirm whether the keyboard uses a hot-swap structure—meaning the switches are not soldered to the PCB. Verifying hot-swap support is more important than selecting an improvised tool.
Check Whether the Mechanical Keyboard Switch Is Hot-Swappable
To determine if the keyboard uses a hot-swap structure, check the product documentation. If it specifies “hot-swap” or “hot-swappable,” the switches are generally not soldered. If you cannot confirm this, inspect the PCB: hot-swap sockets are located where the metal pins connect, whereas soldered switches have their pins secured by solder joints.
You must also verify compatibility between the switch (3-pin or 5-pin) and the PCB, specifically ensuring the plastic alignment pins match the socket holes. In other words, not all mechanical keyboard switches are directly compatible. If the structure is unclear, consult the manual or specifications first to avoid misjudgment that could damage the switch, socket, or PCB.
Why a Mechanical Keyboard Switch Puller Is Normally Recommended
The advantage of a keyboard switch puller is its ability to simultaneously release the locking tabs and control the direction of the pulling force. When used, the puller grips the designated points on both sides of the switch housing, allowing the tabs to release from the mounting plate simultaneously so the switch can be pulled straight up; this method of applying force aligns with the switch’s structural design.
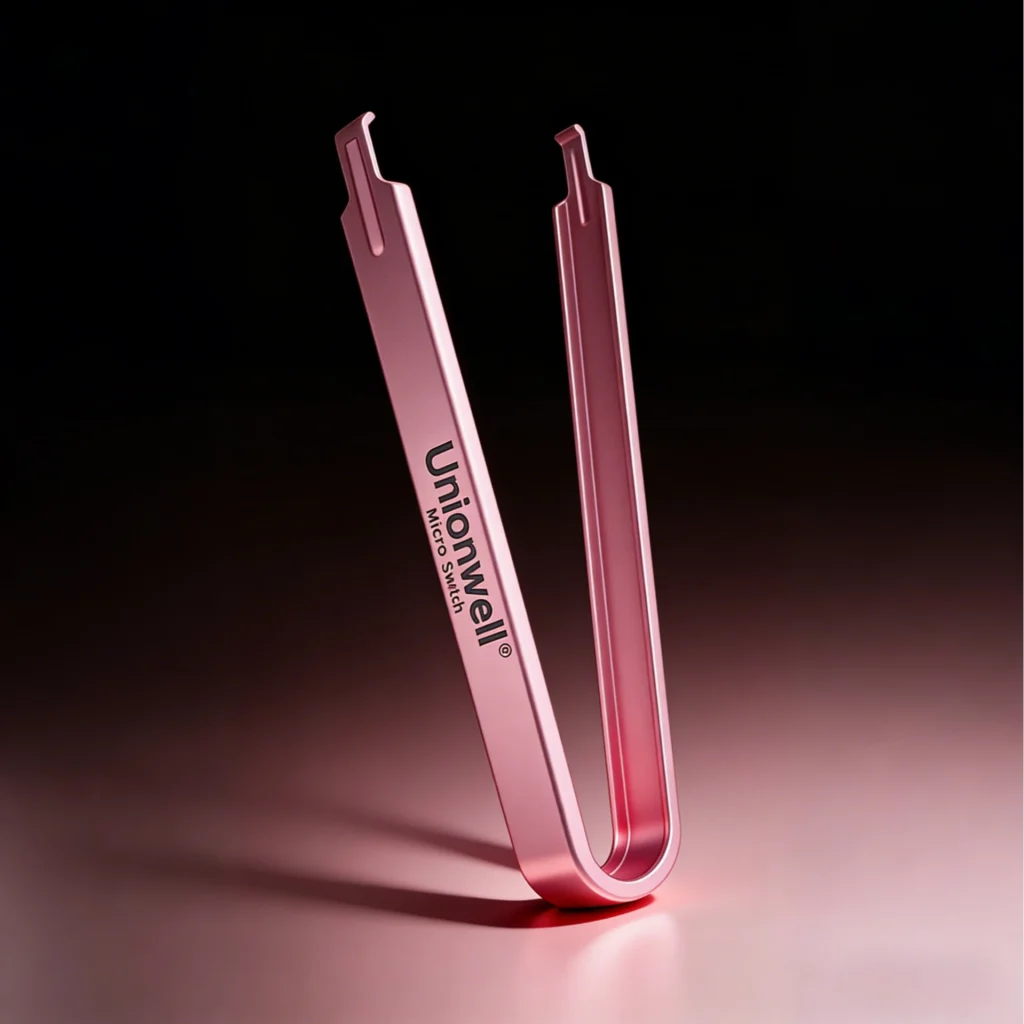
Keyboard Switch Puller
In contrast, using a makeshift tool requires simultaneously managing the latches on both sides and applying upward force; if one side releases while the other remains locked, the switch tends to tilt, placing increased stress on the housing, pins, and PCB socket. Therefore, tool-free removal should be considered only an emergency measure rather than a substitute for a dedicated switch puller. When frequently swapping mechanical keyboard switches, using the proper tool is the more sensible approach.
What Holds a Mechanical Keyboard Switch in Place?
In a hot-swap keyboard, the switch is secured in two ways: the housing is fastened to the mounting plate via clips, and the metal pins at the bottom are inserted into PCB sockets to establish an electrical connection. Removal requires first releasing the housing’s locking mechanism and then withdrawing the pins from the sockets along the correct trajectory.
Forcing the switch upward without fully releasing the clips can place excessive localized stress on the housing; conversely, if the switch has cleared the plate but is pulled at an angle, the pins may bend. A proper understanding of how mechanical keyboard switches are secured is essential for mastering tool-free removal.
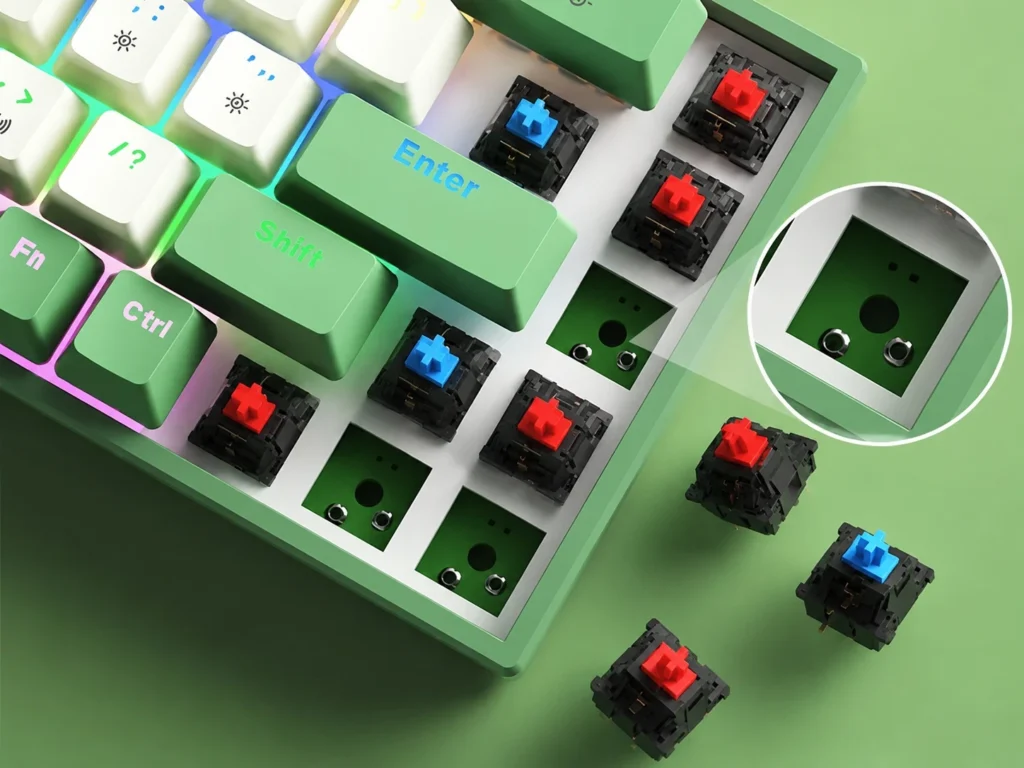
hot-swap keyboard
Mechanical Keyboard Switch Plate Clips
In plate-mounted mechanical keyboards, the switch relies on clips on its housing that engage with cutouts in the mounting plate to lock it in place. During installation, the housing passes through the cutout, and the clips snap back into position, preventing the switch from wobbling or shifting.
To remove the switch, the clips must be compressed inward to disengage them from the plate’s locking area. A dedicated switch puller works by gripping these clips to release them. If the switch is pulled upward before the clips are fully released, the plate will obstruct the housing’s movement, potentially causing deformation. Therefore, the key to tool-free removal is to disengage the mechanical lock before withdrawing the switch along the correct path.
Mechanical Keyboard Switch Pins and Hot-Swap Sockets
Metal pins are primarily responsible for the electrical connection between the switch and the PCB. In hot-swap keyboards, precise insertion of the pins into the PCB sockets is required to ensure a reliable connection. During removal, the pins should be withdrawn from the sockets along a path perpendicular to the PCB. If the switch is significantly tilted, the movement paths of the pins on either side will differ, potentially causing one pin to bend due to excessive lateral resistance.
Consequently, lateral twisting or excessive tilting should be avoided during removal. Even if the switch has come loose, it should not be rocked haphazardly from side to side; doing so can transfer mechanical force through the pins to the socket, creating lateral stress. Thus, applying force in the correct direction is more important than simply increasing the pulling force.
How to Remove a Mechanical Keyboard Switch Without a Tool?
If you have confirmed that your keyboard features a hot-swappable design and you find yourself in a situation where no switch puller is available, you can proceed with the following steps.
Step 1: Disconnect and Stabilize the Keyboard
The first step is to disconnect the keyboard from its power source or USB connection. If the keyboard has just been exposed to a liquid spill, cut the power immediately; continuing to supply power while liquid is on the PCB increases the risk of circuit failure. Once disconnected, place the keyboard on a stable, flat work surface. Ensure there is sufficient space around the switch you intend to remove and that the keyboard will not shift during the process. Remember the golden rule for emergency handling: disconnect power first, then disassemble.
Step 2: Remove the Keycap
Next, remove the keycap to expose the switch housing. If you do not have a keycap puller, apply even pressure to both sides of the keycap. Avoid pulling directly on the switch stem to minimize lateral stress. Once removed, observe the shape of the housing and the location of the retaining clips on either side.
Note: Do not grab the keycap and pull upward in an attempt to remove the switch; the keycap is not the intended point of leverage for switch removal and cannot disengage the switch’s locking mechanism.
Step 3: Release Both Sides of the Mechanical Keyboard Switch
Use a thin, rigid object that can fit into the gaps on either side of the switch (consider using a butter knife, a thin rigid shim, or a paperclip as an improvised tool). Gently press down on the retaining clips to release them from their locked position on the mounting plate.
However, since these tools are not specifically designed for mechanical keyboard switches, exercise caution. Metal objects with sharp edges can scratch the plate, the switch housing, or the PCB. Prioritize tools that are thin, rigid, and easy to control.
Try to release the left and right clips simultaneously. If only one side disengages, do not pull the switch upward immediately; first, verify that both sides have cleared the plate. If you encounter significant resistance, reposition your tool rather than increasing the pulling force.
Step 4: Lift the Mechanical Keyboard Switch Vertically
Once you have confirmed that both housing clips are released, apply even pressure to the switch housing and lift it straight up, keeping the movement as vertical as possible. The key is to pull straight up, rather than prying to one side or rocking it left and right. Since the bottom of the switch remains connected to the PCB socket, excessive lateral movement could bend the pins. If the switch begins to move, pull it upward slowly and steadily so that both the housing and the pins disengage simultaneously.
If the switch cannot be removed easily, stop pulling immediately. Re-check that the retaining clips are fully released and verify that the keyboard actually features a hot-swap design. If the clips are still locked, reposition your tool; if they are released but the switch still won’t budge, the issue may be mechanical—such as a tight socket fit or interference from the mounting plate.
Step 5: Inspect the Mechanical Keyboard Switch and Pins
After removing the switch, first inspect the housing to ensure the retaining clips on both sides are intact—free from cracks, breakage, or significant deformation—and check for any unusual friction marks around the stem.
Next, examine the pins on the bottom; they should be straight, with no obvious bending or misalignment. Do not attempt to reinsert the switch into the PCB socket if a pin is deformed.
Finally, inspect the area around the PCB socket for cracks, looseness, or displacement. If you notice the socket shifting during removal, stop any further insertion or extraction attempts.
If the switch is structurally sound and shows no issues, it can be reinstalled. However, if the housing or clips show cracks or deformation, replacement is recommended to avoid future stability issues with the key.
What Can Go Wrong When Removing a Mechanical Keyboard Switch Without a Tool?
The biggest risk when removing a switch without a tool isn’t simply the inability to pull it out; rather, it is the structural damage caused by the user’s efforts to extract it. Applying force in the correct direction is far more important than simply increasing the pulling force.
Damaging the Mechanical Keyboard Switch Housing
If force is applied from only one side, the housing tends to tilt, subjecting specific areas to excessive stress. For housings that are thin, transparent, or semi-transparent, structural integrity and stability are critical; just because a housing *can* be pried, one should not apply excessive localized prying force.
If the retaining clips are still locked into the mounting plate, prying from one side can cause the clips to bend. Repeated attempts may lead to clip deformation or breakage. Once a clip is damaged, even if the switch can be reinstalled, it may fail to seat securely in the plate.
Bending Mechanical Keyboard Switch Pins
The pins at the bottom of the switch are highly susceptible to damage during tool-less removal. Forcing the switch upward before it has been fully released creates a misalignment between the housing and the PCB socket; this can subject the pins to lateral stress, causing them to bend.
While slight bending can sometimes be corrected, severe kinks, metal fatigue, or breakage can compromise future installation and electrical connectivity, making replacement the recommended course of action. Crucially, a bent pin should never be forced into a PCB socket, as this can cause further damage to the socket itself. Therefore, the condition of the pins should be verified before re-installation.
Damaging the Hot-Swap Socket
Repeatedly rocking the switch from side to side during removal can transfer force through the pins to the PCB socket. Hot-swap sockets cannot withstand unlimited stress, and repeated twisting of the switch can cause the socket to loosen. Once the socket is damaged, even reinstalling a perfectly functional switch may result in unstable contact, unresponsive keys, or intermittent input. Consequently, if a switch cannot be removed vertically, you should re-examine the retaining clips and the connection structure.
When Should You Remove a Mechanical Keyboard Switch Without a Tool?
Emergency Cleaning After a Liquid Spill
If a beverage or other liquid enters the keyboard and pools around a specific key area, you might remove the corresponding mechanical keyboard switch to check for residual liquid.
However, the first step should always be to disconnect the power immediately, rather than removing the switch. Removing the switch only facilitates inspection of local mechanical components; it cannot rule out damage to the PCB, hot-swap sockets, or other electronic parts. Only after cutting the power should you decide on the next steps based on the extent of the contamination. For more information, please refer to 《What to Do If Your Keyboard Switch Gets Wet?》.
Temporary Inspection of a Mechanical Keyboard Switch
If a switch exhibits sticking, input irregularities, or obvious mechanical failure—and you do not have a switch puller on hand—you might consider temporarily removing it for inspection (e.g., to check for abnormal spring-back or mechanical interference during actuation).
However, removing a switch without the proper tool can introduce excessive mechanical stress. If improper handling damages the switch housing or pins—turning a minor issue into a major one—the risk outweighs the benefit. Therefore, this method is suitable only for situations requiring immediate inspection; it is not recommended for routine switch swapping or testing different typing feels.
Why This Method Is Not Recommended for Routine Switch Replacement
If you frequently swap keyboard switches or build custom keyboards, relying on tool-less removal is not advisable. Improvised tools often lack consistency in size, rigidity, and contact points, potentially leading to uneven latch release, housing misalignment, bent pins, and lateral stress on PCB sockets.
While an occasional emergency maneuver might be acceptable, the cumulative risk increases significantly with repeated use. For routine switch replacement, you should use a dedicated switch puller (such as those developed or supplied by keyboard switch manufacturers). This ensures that removal force is applied at the correct location and in the right direction—a far more sensible approach than repeatedly searching for makeshift alternatives.
Conclusion
While it is possible to remove mechanical keyboard switches without tools in certain hot-swap configurations, this method is best reserved for emergencies where a switch puller is unavailable (such as needing a quick inspection or cleanup after a liquid spill). The core of the process can be summarized as follows: Disconnect → Remove Keycap → Release Both Clips → Lift Vertically → Inspect Switch and Pins.
Removing switches without tools is no substitute for using a proper switch puller. To avoid damaging the keyboard switch, pins, plate, or hot-swap socket, appropriate tools should be used for routine replacements or bulk removal. Using the right tools and applying force correctly are essential for ensuring the reliable removal and installation of keyboard switches.