
Blog
Mechanical Keyboard Switch Replacement Guide: What You Need to Check First
As more and more users pursue personalized input experiences, mechanical keyboard switches have become a crucial component affecting feel, sound, response speed, and overall user experience. In recent years, the widespread adoption of hot-swappable mechanical keyboards has further lowered the barrier to switch replacement, allowing even beginners without soldering experience to experiment with different types of mechanical keyboard switches, providing more options.
However, for beginners, purchasing based solely on online recommendations is not entirely reliable. Therefore, a thorough understanding of keyboard structure and switch compatibility is essential before officially replacing a mechanical keyboard switch. This article will introduce what needs to be checked before replacement, including keyboard compatibility, installation methods, switch pin specifications, characteristics of different switch types, and the tools required for replacement, helping beginners complete mechanical keyboard upgrades more safely and efficiently.
Why Checking Mechanical Keyboard Switch Compatibility Matters
Many users believe that all mechanical keyboard switches can be directly replaced, but this is not the case. Mechanical keyboard switch compatibility depends primarily on the keyboard’s PCB, installation method, and structural design, and different brands and models may have differences. Therefore, compatibility should be confirmed before replacement. Ignoring this step may not only result in purchasing incompatible switches, but could also lead to bent pins, PCB damage, or keyboard malfunction.
Check Keyboard Compatibility
Before replacing a mechanical keyboard switch, ensure keyboard compatibility:
- Check the installation method. Hot-swappable keyboards can be directly replaced, while soldered keyboards require soldering tools.
- Confirm that the PCB supports the selected switches, including the number of pins and the positioning post design.
- Check the switch pin layout. Currently, 3-pin and 5-pin switches are the mainstream, and their fixing methods differ.
- Plate mount and PCB mount also have different requirements for switch installation.
- Confirm that the keyboard supports hot-swapping. Check the product manual or consult the manufacturer to avoid incorrect purchase or installation.
The Purpose of Checking Keyboard Compatibility
Checking compatibility in advance can avoid many replacement problems:
- Prevent purchasing incompatible mechanical keyboard switches, reducing wasted time and money.
- Avoid damaging the keyboard through improper operation, such as forcibly removing switches from a soldered PCB, which can cause solder pads to detach or circuitry to be damaged.
- Confirming compatibility specifications in advance helps in preparing appropriate tools and switches, improving replacement efficiency.
Understanding keyboard compatibility information is also beneficial for subsequent maintenance and is the most important step before replacing a mechanical keyboard switch.
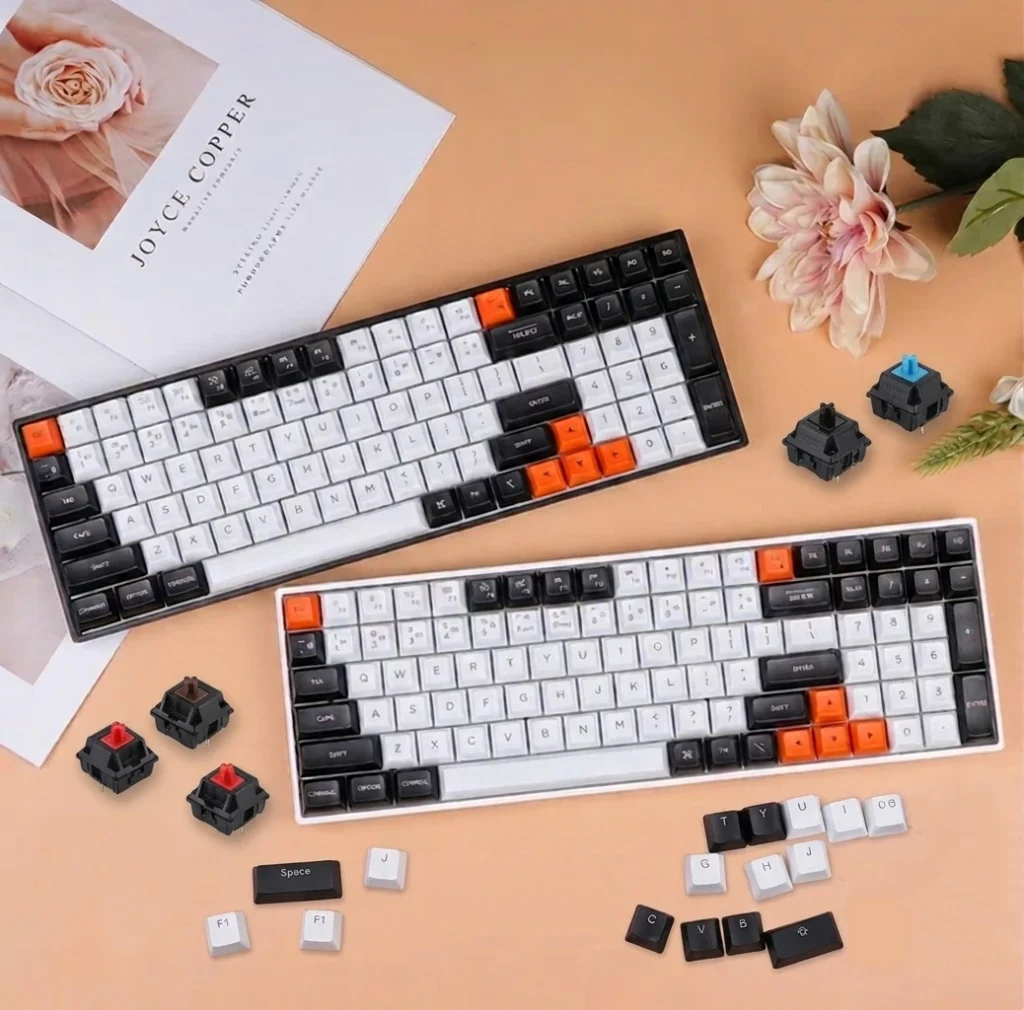
different mechanical keyboard switches
Check Whether Your Mechanical Keyboard Switch Is Hot-Swappable
Confirming whether your keyboard supports hot-swapping is a crucial factor in determining how to replace it later. Currently, mechanical keyboards on the market are mainly divided into two types: Hot-Swappable and Soldered. Not only do the disassembly and assembly processes differ, but the technical requirements for users also vary significantly.
Hot-Swappable Mechanical Keyboard Switch Makes Replacement Easier
Hot-Swappable keyboards have PCBs equipped with hot-swappable sockets, allowing users to directly replace the mechanical keyboard switch without soldering. Replacement is simple: remove the keycap and then use a switch puller to remove the switch. The entire process is quick and easy, without permanently damaging the PCB.
This not only makes it easy for beginners to quickly upgrade switches but also simplifies future maintenance. When a single switch malfunctions, only the corresponding switch needs to be replaced, without disassembling the entire PCB. Furthermore, users can freely experience different types of mechanical keyboard switches based on their gaming, office, or daily typing needs. With the development of customized mechanical keyboards, hot-swappable design has become the mainstream choice for more and more products.
Soldered Mechanical Keyboard Switch Requires Extra Tools
The mechanical keyboard switch of a soldered mechanical keyboard is directly soldered onto the PCB. Replacing it requires specialized tools such as a soldering iron and desoldering pump for disassembly and soldering. The entire process demands a high level of soldering skill; improper operation may result in solder pad detachment or circuit damage. For inexperienced beginners, it is not recommended to disassemble soldered switches themselves to avoid damaging the keyboard. If replacement is necessary, it is recommended to first master basic soldering techniques or have it performed by a professional repair technician to ensure a safe and reliable replacement.
Mechanical Keyboard Switch Pin Layout You Need to Check
Besides confirming whether the keyboard supports hot-swapping, the pin layout of the mechanical keyboard switch is also a crucial factor that cannot be ignored during the replacement process. Many users find that they cannot install switches after purchasing them, not because the switch size is incorrect, but because the pin structure is incompatible with the PCB design. Therefore, understanding the differences between different pin layouts is essential before purchasing.
3-Pin and 5-Pin Mechanical Keyboard Switch
Currently, mechanical keyboard switches on the market come in two structures: 3-Pin and 5-Pin. 3-Pin switches use two metal pins and one positioning post, offering high compatibility and are widely used in mass-produced keyboards. 5-Pin switches add two plastic positioning posts for a more stable fit and are more common in custom mechanical keyboards.
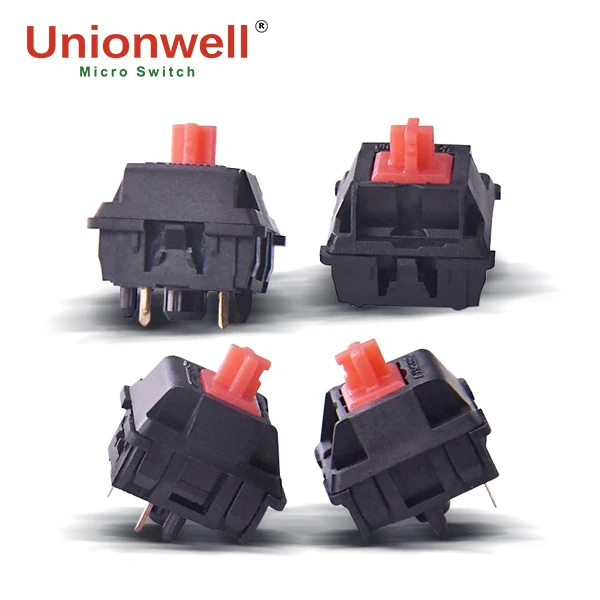
5 pin mechanical keyboard switch
It’s important to note that not all PCBs support 5-Pin switches. If incompatible, the positioning post can be trimmed before installation, but the switch itself cannot be restored. However, PCBs supporting 5-Pin switches are usually also compatible with 3-Pin switches, offering wider applicability.
Mechanical Keyboard Switch Contact Pins
Before installation, carefully inspect the metal pins of the mechanical keyboard switch to ensure they are free of breakage, bending, or deformation. Otherwise, they may not insert into the Hot-Swap Socket and could even affect key actuation. Also, check the pins for oxidation or dirt to avoid affecting contact performance.
During installation, keep the shaft perpendicular to the PCB, align it with the socket, and apply even pressure. Do not wobble from side to side or force it in. If abnormal resistance is detected, stop immediately and check the pin orientation to avoid permanent deformation. Proper pin condition is crucial for successful installation and long-term stable use.
Choose the Right Mechanical Keyboard Switch Type
After confirming compatibility, you should choose the appropriate mechanical keyboard switch based on your usage needs. Different switches vary in actuation force, feel, sound, and typing experience; the best choice is the one that suits your usage habits and scenarios.
Linear Mechanical Keyboard Switch
The biggest feature of the Linear Mechanical Keyboard Switch is the absence of noticeable tactile feedback during pressing. From the initial press to bottoming out, the entire movement trajectory remains continuous and smooth. Due to the small change in actuation force, continuous and rapid typing is easier, especially suitable for users who need to perform frequent high-speed operations (such as e-sports players, FPS gamers, and competitive users).
At the same time, the smooth movement process also reduces fatigue from repetitive pressing over long periods, which is why this type of switch has seen its market share in the gaming keyboard market increase year by year in recent years.
Tactile Mechanical Keyboard Switch
The Tactile Mechanical Keyboard Switch provides noticeable tactile feedback during pressing, allowing users to clearly feel the actuation point without having to press all the way down each time. This feedback helps users feel more certain about their input, and is therefore widely used in office work, software development, and scenarios involving prolonged text input.
For users who type a lot every day, moderate paragraph feedback can improve typing rhythm, reduce accidental keystrokes, and improve overall work efficiency.
Clicky Mechanical Keyboard Switch
The Clicky Mechanical Keyboard Switch combines tactile feedback and clear click sounds, enhancing typing rhythm and making it suitable for home entertainment, personal office, and gaming environments. However, due to its relatively loud sound, it should be chosen with caution in quiet environments such as offices or libraries. Different mechanical keyboard switches have different characteristics, and the choice should be based on the actual usage scenario.
Tools Needed for Mechanical Keyboard Switch Replacement
Preparing the right tools not only improves replacement efficiency but also effectively reduces the risk of damaging the switches or keyboard during installation.
Keycap Puller
The keycap puller is the most basic tool for removing keycaps. Compared to pulling the keycaps off by hand, this tool maintains even pressure, preventing keycap deformation and reducing wear on the keycap’s cross-shaped connector. When removing the keycaps, it is recommended to pull them vertically and evenly upwards, avoiding swaying from side to side to prevent damage to the keycap structure.
Keyboard Switch Puller
The keyboard switch puller is used to remove the hot-swap switch. When using it, clamp both sides of the switch’s clips simultaneously, then slowly pull it out vertically. Never clamp only one side or apply force at an angle, as this can easily damage the switch clips or even the hot-swap connector, affecting the lifespan of the keyboard switch and PCB connector.
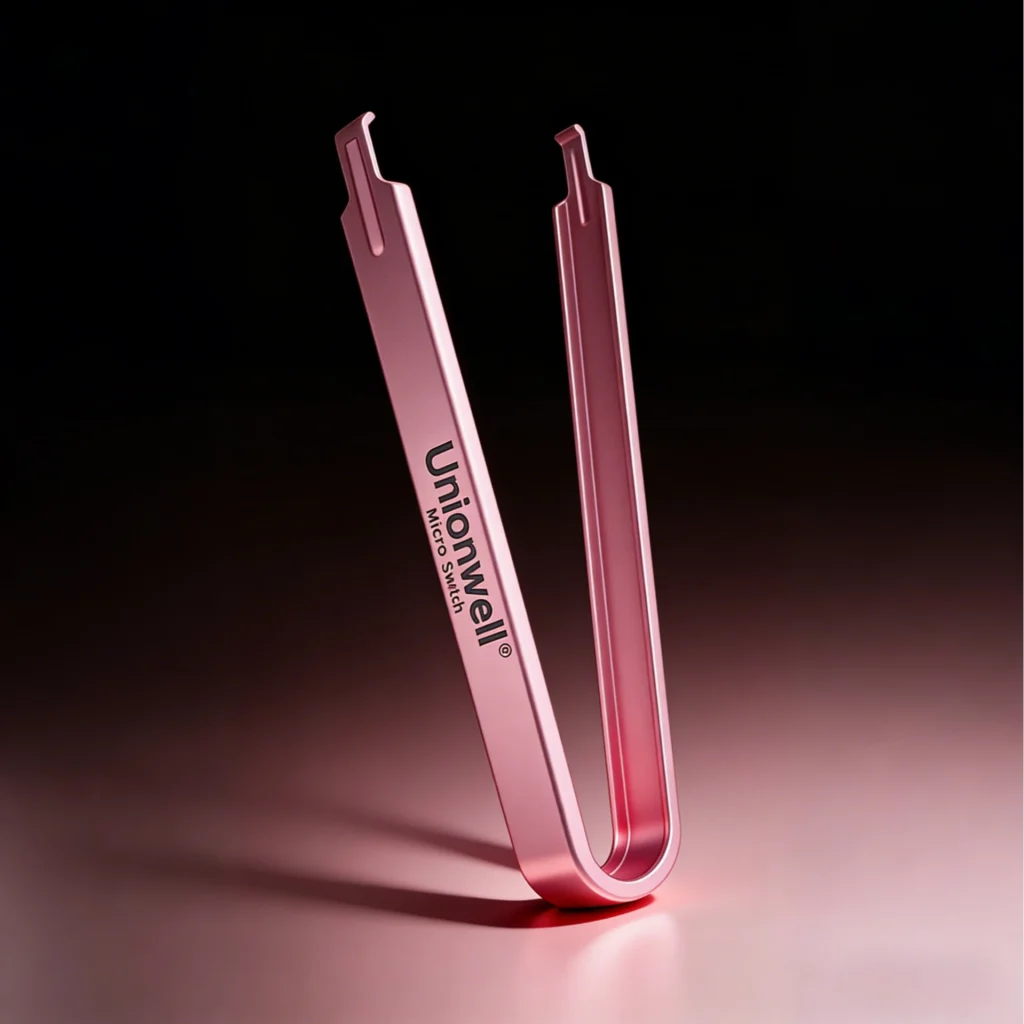
switch puller
Keyboard Testing Software
After installation, you can use the Keyboard Testing Software to test all keys. Tests include whether they can be triggered normally, whether there are missed triggers, duplicate triggers, and whether all keys are correctly recognized.
Software testing can promptly identify problems during installation, such as incomplete pin contact or improper switch installation, thus preventing malfunctions during subsequent use.
Replacement Tips for Beginners
For beginners, standardized operation is more important than speed. Before replacing, disconnect the keyboard power or USB. It is recommended to replace sections gradually to avoid switching mix-ups. Before installation, confirm the pin direction, keep the switch perpendicular to the PCB, and apply even pressure; do not force it in. After completing each section of installation, use the keyboard testing software to check the key status. This can effectively reduce installation errors and improve the efficiency of mechanical keyboard switch replacement.
Conclusion
Replacing a mechanical keyboard switch is not simply about disassembling and installing switches. More importantly, it’s about confirming beforehand whether the keyboard compatibility, installation method, pin layout, and switch type meet your needs. Thorough preparation not only improves replacement efficiency but also avoids unnecessary installation risks.
With the continuous development of the hot-swappable mechanical keyboard and custom market, more and more users are choosing suitable mechanical keyboard switches based on their needs. For keyboard switch suppliers, continuously optimizing product compatibility, manufacturing precision, and consistency, and constantly improving the stability and installation experience between different switch types, will help users upgrade their keyboards more easily and further drive the entire mechanical keyboard industry towards higher quality, more diverse choices, and greater personalization.